
Article
White balance in ALTRON: automatic or with a white card?
Why does a white sheet of paper look slightly yellow in the image under workshop lamps and slightly blue under fluorescent lights? Our eyes compensate for the color of the light on their own; the camera does not. White balance in ALTRON fixes exactly that: it adjusts the gain of the three red, green and blue channels so that white stays white. If color matters for your inspection, this is the first color setting you need to get right.
Two methods, depending on the ambient light
These tools are located in different places on line-scan and area-scan cameras. First we cover the color line-scan camera, then the color area-scan camera.
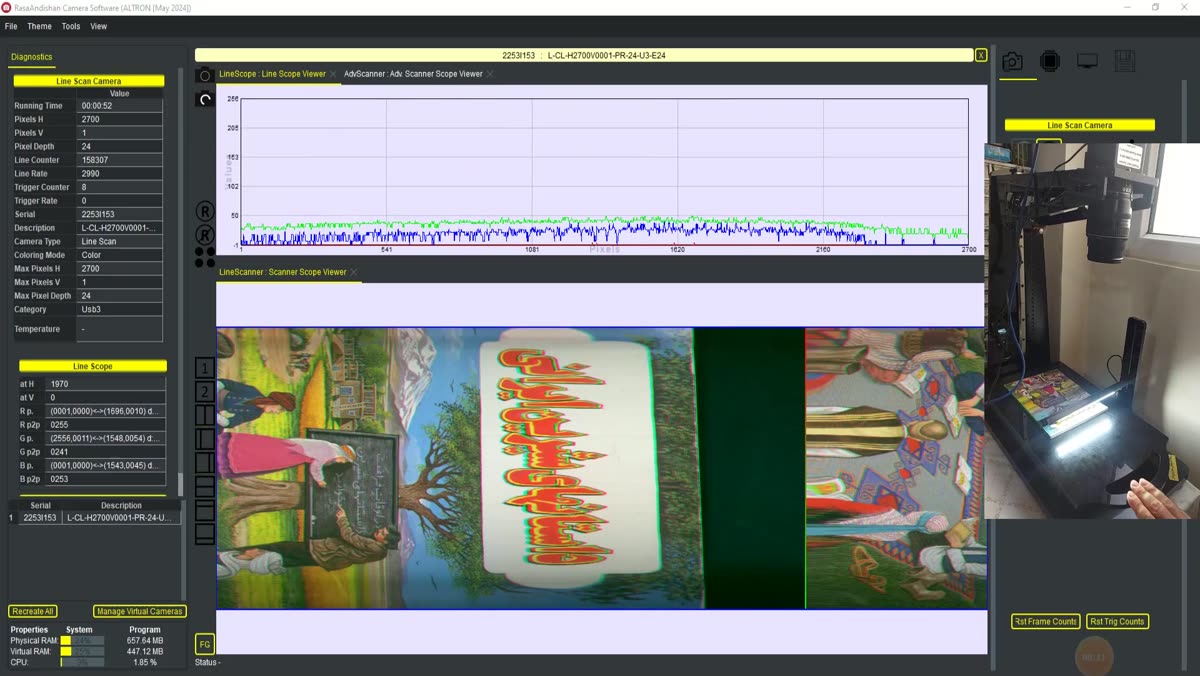
In the ready-made graph for the color line-scan camera, the two required nodes are already present: BLC (black level) and AutoWhiteBalance. The BLC node panel has a section called Auto White Balance, and that is where the main work is done.
- Set the exposure to the actual working value and turn on the production line lighting.
- In the BLC panel, in the Auto White Balance section, check Set Analog Gain First.
- In Method, select White point (white sheet).
- Press the Auto White Balance button. The program first asks you to close the lens cap so that the black level can be measured. Then hold the white sheet in front of the lens.
- The calibration has four stages: black level, bringing the brightest color to 90 percent of full scale, black level again, and gain again. At the end, the Contrast sliders in the camera panel have been set automatically.
Contrast is the camera's own analog gain, so the color is corrected before software processing. These values are sent to the camera again at every Start. For fine color adjustment, you can also nudge the Contrast of each channel manually. Just remember that higher gain also increases that channel's noise.
If you don't have a white sheet, set Method to Grey world (scene). In this mode, the average color of the scene itself is assumed to be neutral. On a strongly colored scene this assumption is wrong: for example, if most of the frame is green, the image also comes out green.
The AutoWhiteBalance node is turned on and off with the Activate/DeActive button. A green light means it is running and red means it is off. This node continuously computes the white point from the most recent lines. In this computation, near-grey pixels carry the most weight and strongly colored pixels have almost no effect.
In Reference (White Point), choose one of the two modes:
In the ready-made graph for the color area-scan camera, the BayerAutoWhiteBalance node is already present. This node works on the raw Bayer data, before debayering. It excludes highly colored, very dark and saturated regions and estimates the light only from near-neutral regions. With Compute Every you set how many frames pass between coefficient computations. The default is 25. A lower number reacts faster to changes in light, and a higher number keeps the color more stable.
For constant lighting, add the WhiteBalance node in the graph editor. This node is for area-scan cameras only:
- Place a uniform white card in front of the camera so that it covers the whole frame.
- Press Compute and Save Factors. The coefficients are computed from the last frame and saved in a file with the extension wb-factors-rev2.
- Load that same file with Load and turn on Enable.
- The Compatibility line should show compatible. If it doesn't, the file does not match this camera's dimensions.
These coefficients are computed separately for each pixel, so any unevenness of the light on the card is recorded in them too. Place the card flat and evenly lit.
For a more general explanation of color balance and white balance, see Wikipedia (English).
See our color cameras on the line scan cameras and area scan cameras page. If the color of your image still isn't coming out right, share it with us via contact page so we can look into it together.