
Article
Dark and white calibration in ALTRON and correcting lens vignetting
Try a simple experiment. Put the camera in front of a perfectly uniform white surface and look at the image. Most likely the center is slightly brighter than the corners, and if you look closely you will see columns or pixels that differ slightly from their neighbors. The surface is uniform; the image is not. Dark and white calibration exists to remove exactly this difference.
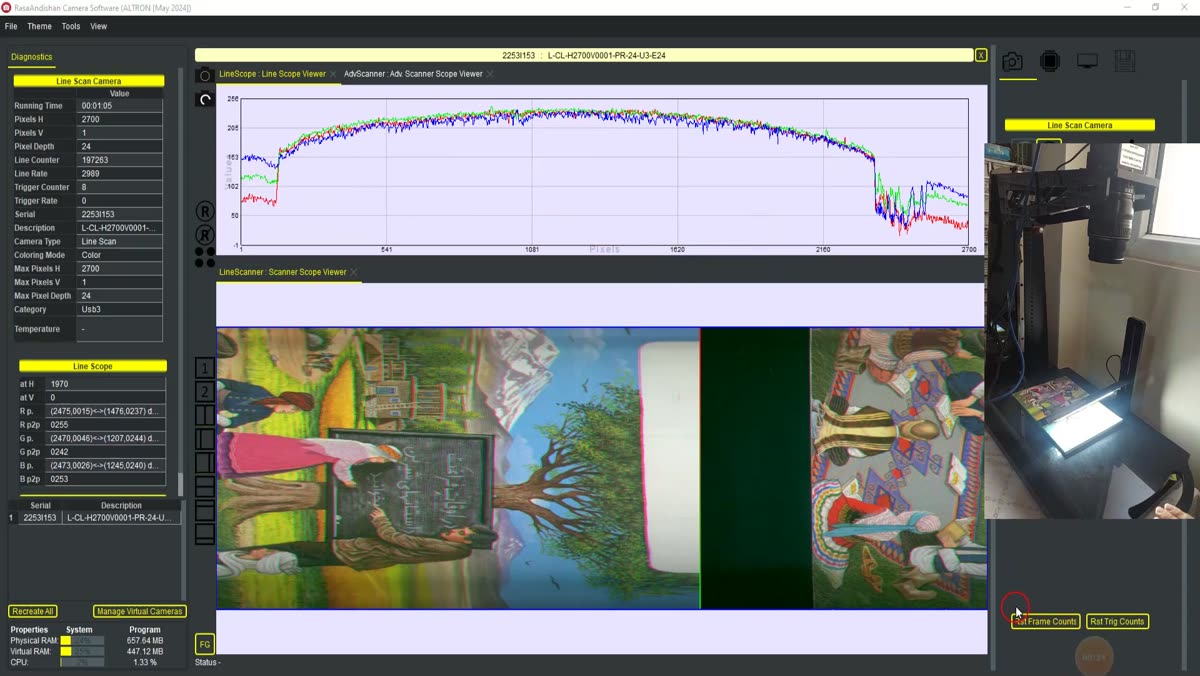
Where does this unevenness come from?
It has two main sources. The first is the sensor itself. Even in total darkness, each pixel gives a slightly different value. Under the same light, pixel sensitivities are not exactly equal either. The second source is the lens. Every lens passes less light at the edges; this effect is called vignetting. In measurement work, the result is that the same object reads darker in a corner than in the center. This is a systematic error, not noise.
Uneven lighting has the same effect. If a lamp lights one side of the frame more brightly, the camera sees that as a real difference in the surface.
This plug-in works on both line scan and area scan cameras. It applies two corrections at once:
So you usually don't need to treat corner darkening separately. A white map taken with the real lens and lighting already includes it.
- Set exposure and gain to the values you use in real work. A reference taken with other settings will make the correction wrong.
- Put the lens cap on or block all light completely. Press Capture Dark, wait a few moments while the frames are averaged, and press Stop Dark. The map is built and applied, and the program asks where to save the dark.corr file.
- Remove the cap and put a uniform white surface in front of the camera, with no saturated areas. Press Capture White, then Stop White, and save the white.corr file.
- Apply Offset and Apply Gain are ticked automatically after each map is captured or loaded. The status bar at the bottom of the panel shows the progress.
Next time you don't need to calibrate again. Use Load Dark… and Load White… to load each map separately from its corr file. If the file does not contain the requested map, loading is rejected with a message. The button next to each row removes only that row's map. Clear All clears both maps at once.
The White to option sets the level the white scene should reach after correction:
After changing this option or the file paths, press Apply to send the settings to the plug-in.
Sometimes it isn't practical to put a large, uniform white surface in front of the camera. For this situation we have the LSHC-Lens Shading Correction plug-in. It has only one setting: Strength (%), from 0 to 300. The plug-in raises the gain toward the edges and corners to compensate for lens darkening. At 0 it is off. This is a parametric correction and is only used when no measured map is active.
Values above 100% are usually a mistake, because they make the corners brighter than the center. Strong correction also amplifies noise in the corners. If the corners look grainy, lower Strength.
- Capturing the white reference with a shorter or longer exposure than in real work.
- A white surface with spots, texture or reflections. Any unevenness in it is recorded in the map and ends up on every image that follows.
- Placing this correction after gamma or sharpening. Physical sensor corrections must come before any cosmetic change. Otherwise they are applied to already modified data and the result is silently wrong.
- Closing the white.corr save dialog without saving. The map works for now, but it is gone the next time the program starts.
Whenever you change the lens, aperture or lighting, capture the white reference again. A white map belongs to the lens and lighting combination it was made with.
For a more general explanation of flat-field correction, see Wikipedia (English).
If you still have questions about calibrating your line scan or area scan camera, ask us through contact form. We're happy to help.